
A 240-volt circuit takes up 2 slots on a manual transfer switch, not 1.
That rule comes from Electrical Engineering Portal’s installation walkthrough, and it’s the kind of detail that changes which switch you buy.
Below are the 8 steps of a generator transfer switch installation, in the order the work happens.
Each step says what you can do yourself and where a licensed electrician takes over.
Best for: homeowners with a portable generator who want power on hardwired circuits like a furnace blower. Skip it if your standby generator’s installer already put in an automatic switch.
Cost: Set by switch type, amperage and local labor rates, which the transfer switch installation cost breakdown covers in detail.
First step: Grab a notepad and list the circuit breaker for every load that must stay on in an outage.
How to Install a Generator Transfer Switch Step by Step
A generator transfer switch installation takes 8 steps. You size the load, pick the switch, get a permit, cut power, mount the switch, move circuits, add the inlet and test.
Steps 1 to 3 are planning that anyone can do, and steps 4 to 7 put hands inside the main circuit panel.
Step 1: Add Up Your Loads and Pick the Circuits
Start with what has to run, not with the hardware.
Electrical Engineering Portal’s walkthrough sizes the generator by adding the running watts of every load you want to power and multiplying the sum by 1.25.
Say your fridge, furnace blower and lights add up to 3,000 running watts in a made-up example. Multiply by 1.25 and you need a generator that delivers at least 3,750 watts.
Motors pull extra power for a moment when they start, so read up on running vs starting watts before you trust the total.
Next, match every load on your list to its breaker in the circuit panel. The same walkthrough says each double-pole 240-volt circuit needs 2 of the switch’s 120-volt circuits, and that 15-amp and 20-amp circuits must never be mismatched.
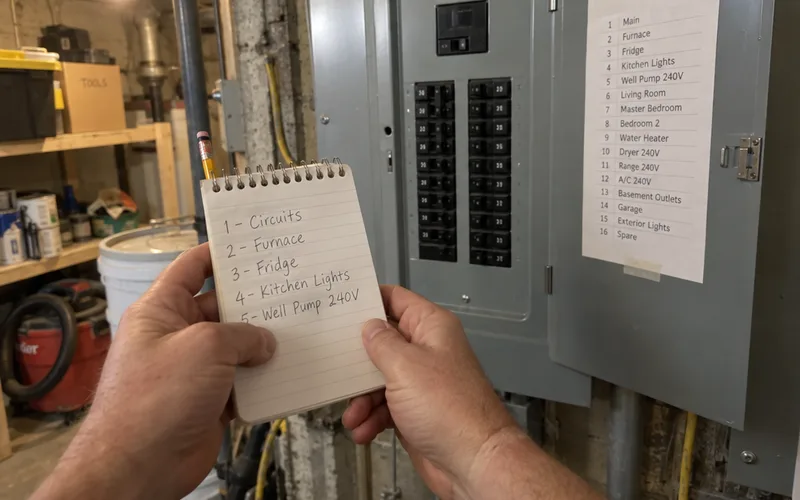
So a switch with 6 circuits holds 6 ordinary loads, or 4 ordinary loads plus 1 240-volt load. Spread the biggest loads across both sides so one side doesn’t carry most of the work.
One more check before you buy: does any circuit on your list run through a GFCI or AFCI breaker?
If so, confirm in the switch’s manual that it supports those breakers. Some pre-wired switches don’t, and it’s far cheaper to learn that on paper.
In other words, the finished circuit list decides what you buy, so don’t shop until you have it.
Step 2: Choose a Manual or Automatic Transfer Switch
The right transfer switch depends on your generator. The same walkthrough notes that manual switches need a person to change the power source.
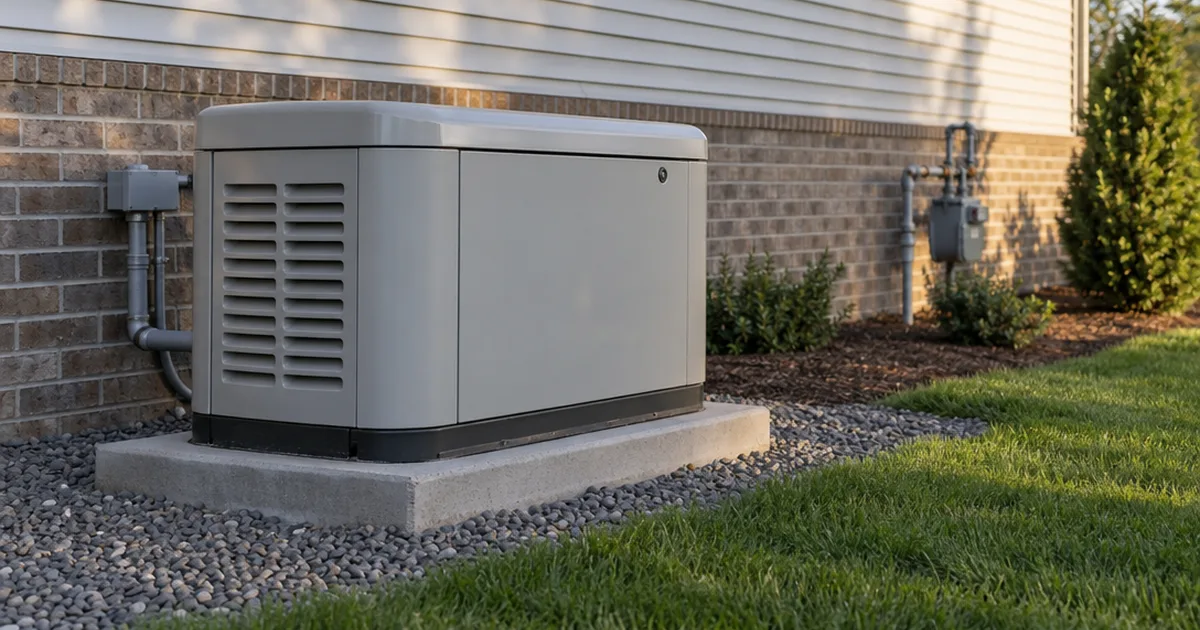
Automatic switches do the job by themselves, which is why they pair with standby generators.
Here’s how the common setups line up:
| Your setup | What to install | Who switches it |
|---|---|---|
| Portable generator, a few hardwired circuits | Pre-wired manual transfer switch | You, circuit by circuit |
| Portable generator, circuits chosen at the panel | Interlock kit on the main panel | You, at the main breaker |
| Standby generator | Automatic transfer switch | The switch, by itself |
Most portable-generator owners land in the first row. The types of generator transfer switches page covers every option in depth.
If you’re comparing models, the best manual transfer switch picks are sorted by circuit count and amp rating.
Match the switch and inlet to your generator’s largest outlet, usually 30 amps or 50 amps. The 30-amp vs 50-amp generator comparison shows which outlet your unit has and what each one can carry.
Step 3: Get the Permit Before You Buy Parts
A transfer switch changes your home’s wiring, so most building departments treat it as electrical work that needs a permit and an inspection. The inspector checks the job against the National Electrical Code, the NEC, plus any local amendments.
Call before you buy anything, because the answer can decide who does the wiring. Here’s what to say:
“I’m adding a manual transfer switch and an outdoor inlet for a portable generator at my house. Do I need an electrical permit, and can I pull it as the homeowner, or does a licensed electrician have to?”
Write down the answer and the name of the person who gave it. The transfer switch permit page covers what inspectors usually look for.
Step 4: Shut Off the Main Breaker and Test for Power
This is the step where the danger starts. Electrical Engineering Portal’s walkthrough warns that after you turn off the main breaker, the terminals where power enters the main breakers are still energized.
Switching off the main breaker doesn’t make the whole panel dead, because the utility feed above it stays live.
So test every wire you plan to touch with a non-contact tester, then confirm with a multimeter. Work by headlamp or a battery light, since the room lights go out with the main.
Tape a note over the main breaker so nobody flips it back on. Then tell everyone in the house what you’re doing and for how long.
Live service lugs a few inches from your hands? If that sounds like a bad idea, hand steps 4 to 7 to an electrician.
Step 5: Mount the Switch Next to the Main Panel
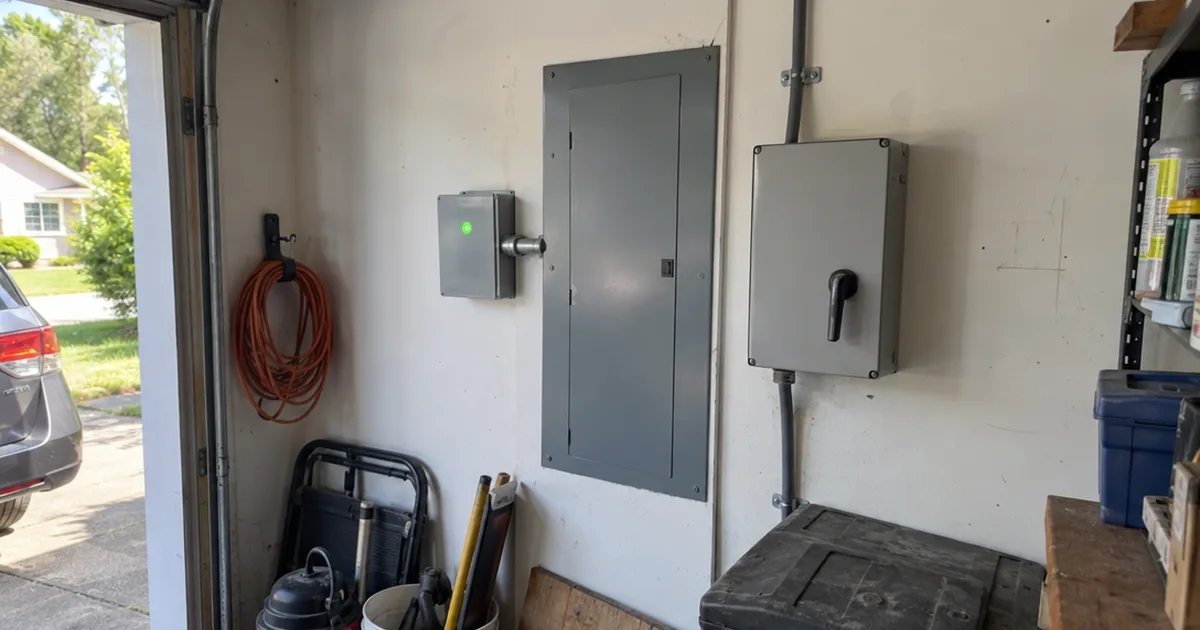
A manual transfer switch hangs on the wall beside the main panel, because its pre-wired leads have to reach the breakers. The EEP walkthrough places the box so its closer edge sits about 18 inches from the center of the main service panel.
Before you fix the box to the wall, pick a knockout on the bottom of the panel sized for the switch’s flexible conduit.
Feed the labeled wires through without nicking them. Then lock the conduit to the panel with a locknut, plus a bushing where needed.
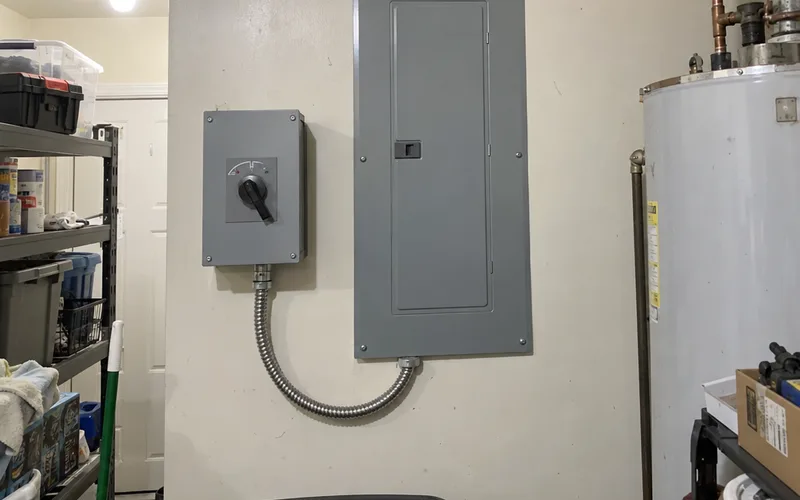
Most switches go indoors, in a basement, garage or utility room, while the inlet goes outside. If your panel sits on an outside wall, the inside or outside comparison explains which switch ratings work there.
Step 6: Move Each Circuit Onto the Switch
Moving a circuit means putting the transfer switch between the breaker and the house wiring. The walkthrough does it one circuit at a time, in this order:
- Pull the breaker for the first circuit on your list and disconnect its hot wire.
- Attach the switch’s red lead for that circuit to the breaker, then snap the breaker back in.
- Twist that circuit’s black switch lead to the old hot wire with a wire connector. Tuck both neatly at the edge of the box.
- Repeat for every circuit on your list.
- Land the switch’s white neutral on the neutral bus bar and the green ground on the ground bar.
- Put the circuit panel cover back on and fill in the circuit map.
A 240-volt circuit uses 2 neighboring switch circuits whose handles are tied together, so both legs always switch at once.
A multiwire branch circuit, 2 hots sharing 1 neutral, needs the same pairing. Ask your electrician to check for one before any wire moves.
The labels on the leads tell you which circuit is which, and the circuit map is what you’ll read by flashlight during a storm.
Step 7: Add the Power Inlet Box and Run the Feed
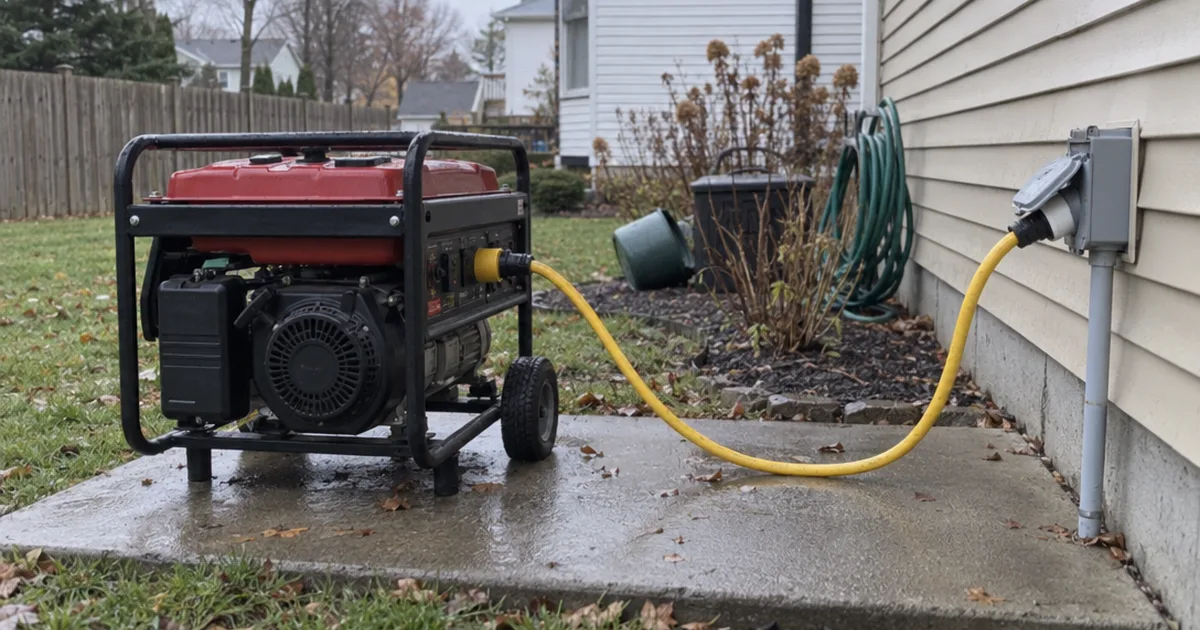
The power inlet box is the outdoor socket your generator cord plugs into. It mounts on an outside wall, as close to the panel as the house allows.
A cable or conduit runs through the wall from the inlet to the switch’s generator input.
Drill the wall hole only as big as the cable or conduit needs. Seal around it so water can’t follow the wire inside.
Use wire rated for that amperage the whole way, since the inlet, the cord and the switch all carry the same current.
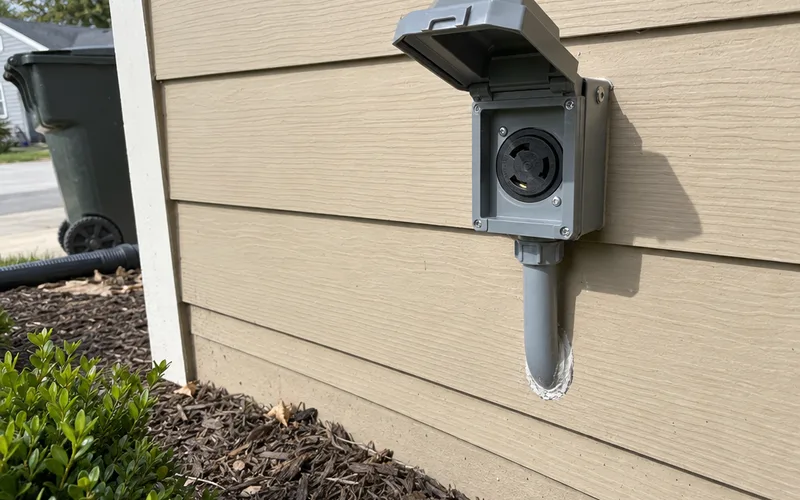
The generator inlet box installation page covers mounting height, box ratings and wiring in detail.
Pick the inlet spot with the running generator in mind too. The cord length sets how far from the house it can sit.
Step 8: Test the Switch Before You Need It
Test the installation on a calm day, not during the first outage. Set every switch circuit to LINE, restore utility power and check that each moved circuit still works normally.
Then run the generator test in this order:
- Set the generator up outdoors, far from doors, windows and vents.
- Plug the generator cord into the generator and the inlet before you start the engine, never while it’s running.
- Start the generator and let it settle.
- Flip the circuits to GEN one at a time, alternating sides and watching the wattage meters if your model has them.
- When you’re done, flip every circuit back to LINE first, then shut the generator off.
Turning circuits on one at a time keeps a stack of motor starts from tripping the generator’s breaker.
Press TEST and then RESET on any GFCI outlet on a moved circuit, so you know it still trips on generator power. If a circuit won’t pick up generator power, the transfer switch not working guide lists the usual causes in order.
What You Need for a Transfer Switch Installation
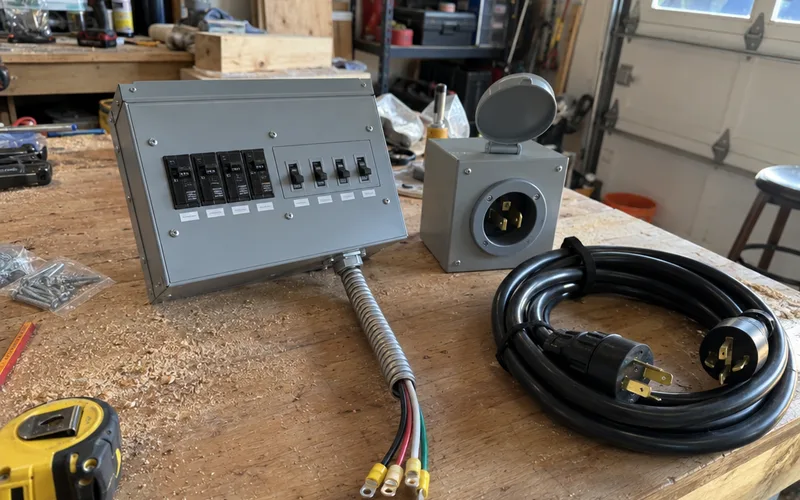
A transfer switch installation needs ordinary electrical hand tools plus 4 parts that share one amp rating: the switch, an outdoor inlet, the wire and a generator cord. The non-contact tester and multimeter are the 2 tools you can’t skip, because Step 4 depends on them.
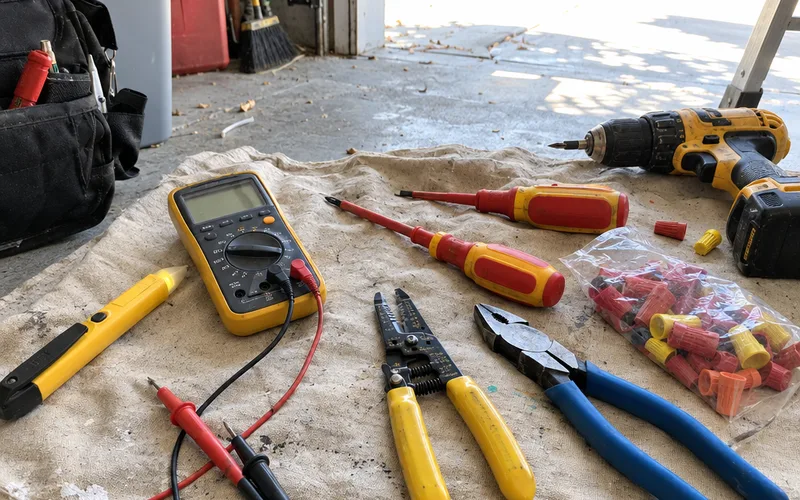
The parts that matter most:
- A transfer switch with enough circuits for your list, counting 2 for every 240-volt load
- An outdoor power inlet with the same amp rating as the switch
- Wire and conduit rated for that amperage
- A generator cord that matches both the generator outlet and the inlet
Some switch kits come with the inlet and a cord in the box. Check the parts list before you buy extras, and make sure every piece carries the same amp rating.
What Does a Generator Transfer Switch Do?
A generator transfer switch is a switch beside your main circuit panel that runs selected circuits on utility or generator power, never both at once. That “never both” part is the whole reason it exists.
Without it, the only way to feed house wiring from a generator is to push power backward through the panel. That’s called backfeeding a generator, and it can send power out onto the utility lines where repair crews are working.
A transfer switch also controls what runs, with no extension cords snaking through a window. The circuits you chose in Step 1 stay wired in, and the switch picks the source for each one.
Hardwired loads are the real payoff: a furnace blower or well pump has no plug. A switch or an interlock is the only safe way to run one on a portable generator.
The shortcut to avoid is a cord with a plug on both ends, pushed into a wall outlet.
That cord backfeeds the house with no switch in the way. So running a generator extension cord into the house only works for appliances plugged straight into the cord.
Can You Install a Generator Transfer Switch Yourself?
You can install a generator transfer switch yourself only if your local rules allow a homeowner permit and you’re comfortable working beside live service terminals. Electrical Engineering Portal notes that the risk of backfeed is the main reason many municipalities insist that only a licensed electrician hooks one up.
So the honest answer depends on 2 things: what your building department says, and whether you’ve wired breakers in a panel before.
Here’s a fair split for most people:
- You can do: the circuit list, the load math, buying the switch and inlet, the permit call and the testing.
- Hire out: opening the panel, moving circuits, landing the neutral and ground, and drilling and wiring the inlet.
A hired electrical contractor pulls the permit, books the inspection and stands behind the work.
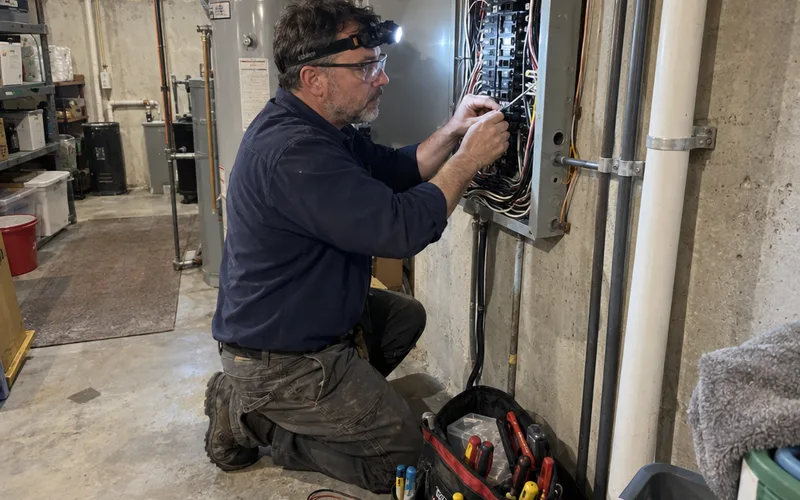
If you hire one, hand over your circuit list and switch choice at the first visit. It saves time on the job.
How to Use a Transfer Switch During an Outage
To use a manual transfer switch, plug the generator into the inlet and start it. Then flip your circuits from LINE to GEN one at a time.
It’s the same order as the Step 8 test, so the first outage shouldn’t be the first time you do it.
Where the generator sits matters just as much. Run it outdoors, far from doors, windows and vents, and follow the carbon monoxide placement rules for your setup.
What about the main breaker?
A pre-wired manual switch keeps each moved circuit apart with its own LINE and GEN toggles. Its manual tells you whether the main breaker needs to come off.
With an interlock kit, the main breaker always goes off before the generator breaker goes on, because that’s how the interlock blocks backfeed.
When utility power comes back, flip every circuit back to LINE, then shut the generator down and unplug the cord. Keep the circuit map, a flashlight and the generator’s manual together by the panel.
Interlock Kit vs Transfer Switch
An interlock kit is a metal plate on the main panel that lets only the main or the generator breaker be on, never both. It’s the main alternative to a transfer switch for portable generators.
An interlock still needs an outdoor inlet and its own generator breaker in the panel.
The trade-off is control: a transfer switch only powers the circuits you wired to it. An interlock lets you pick any circuit by flipping breakers by hand.
That freedom means more breaker juggling in the dark.
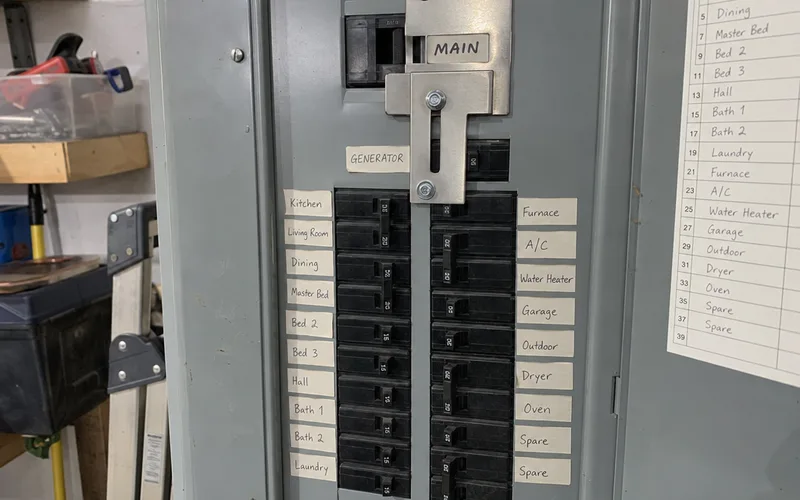
If an interlock fits you better, installing an interlock kit covers the panel work. The interlock vs transfer switch comparison weighs the 2 side by side.
Both are ways to connect a generator to your house safely, and both still need a permit in most places.
How Automatic Transfer Switch Installation Differs
An automatic transfer switch is installed as part of a standby generator job, usually by the dealer or electrician who sets the generator, and it needs control wires to the generator on top of the power wiring. Electrical Engineering Portal describes how automatic switches detect the loss of power, start the backup generator and switch over to it.
With standby units from Generac Generators and other brands, the same crew handles the pad, fuel line and permit. The installation requirements page covers what your home needs before that job starts.
Many whole-home automatic switches replace or sit beside the main service disconnect. That puts the work on the utility side of the panel, which is licensed-electrician territory everywhere.
Once it’s in, an automatic switch still needs regular checks. The automatic transfer switch maintenance schedule shows what to inspect and when.
The rest of the setup is covered under home generator installation.
Frequently Asked Questions
Can a homeowner install a generator transfer switch?
A homeowner can install a generator transfer switch only where local rules let homeowners pull an electrical permit for their own house, and many municipalities require a licensed electrician instead. Call your building department first, then decide whether you’re comfortable working beside service terminals that stay live with the main breaker off.
How much does it cost to install a transfer switch for a generator?
Transfer switch installation cost depends on the switch type, its amperage, how far the inlet sits from the panel and local electrician rates, so an automatic switch for a standby generator costs more than a pre-wired manual switch. Get 2 or 3 written quotes that list the switch, the inlet, labor and the permit separately.
Do you have to turn off your main breaker when using a generator transfer switch?
A pre-wired manual transfer switch isolates each moved circuit with its own LINE and GEN toggles, so follow its manual on the main breaker, while an interlock kit always needs the main breaker off before the generator breaker goes on. Either way, plug in the generator cord before you start the engine.
Can a generator transfer switch be installed inside?
Yes, a manual transfer switch is normally installed inside, on the wall next to the main panel, while only the power inlet box goes on the outside wall. Outdoor-rated switches exist for homes whose panel sits outside, and the inside or outside choice follows where your panel is.
How do you hook up a generator to your house?
The safe way to hook up a generator to your house is through a transfer switch or an interlock kit, with the generator plugged into an outdoor power inlet that feeds the panel. Never plug a generator into a wall outlet, because that sends power back toward the utility lines.
What is a power generator transfer switch?
A power generator transfer switch is a switch mounted beside your main panel that lets selected circuits run on either utility power or generator power, never both at once. Manual versions need you to flip them, and automatic versions switch over on their own.
How should the connections from a generator power switch be connected to the breaker?
On a pre-wired manual transfer switch, the switch’s red lead for each circuit goes on that circuit’s breaker, and its black lead is spliced to the house wire that used to sit on the breaker. The white neutral lands on the neutral bus and the green ground on the ground bar.
Final Thoughts
A transfer switch installation is mostly planning: the circuit list, the switch size and the permit decide everything that happens inside the panel.
This week, walk your panel with a notepad, list the breakers that must stay on in an outage, and call your building department about the permit.